First hands-on experience with Data Build Tool (dbt)
📌 Start a dbt project from the scratch
Who is this article for?
This article is for those who want to understand what is DBT and to develop some ELT tasks using dbt from the scratch. Those who read this article are supposed to:
- know how to use pip
- have already installed python
- have already created your pip env
- have already installed gcloud CLI
- have already installed git CLI
What is Data Build Tool (dbt)
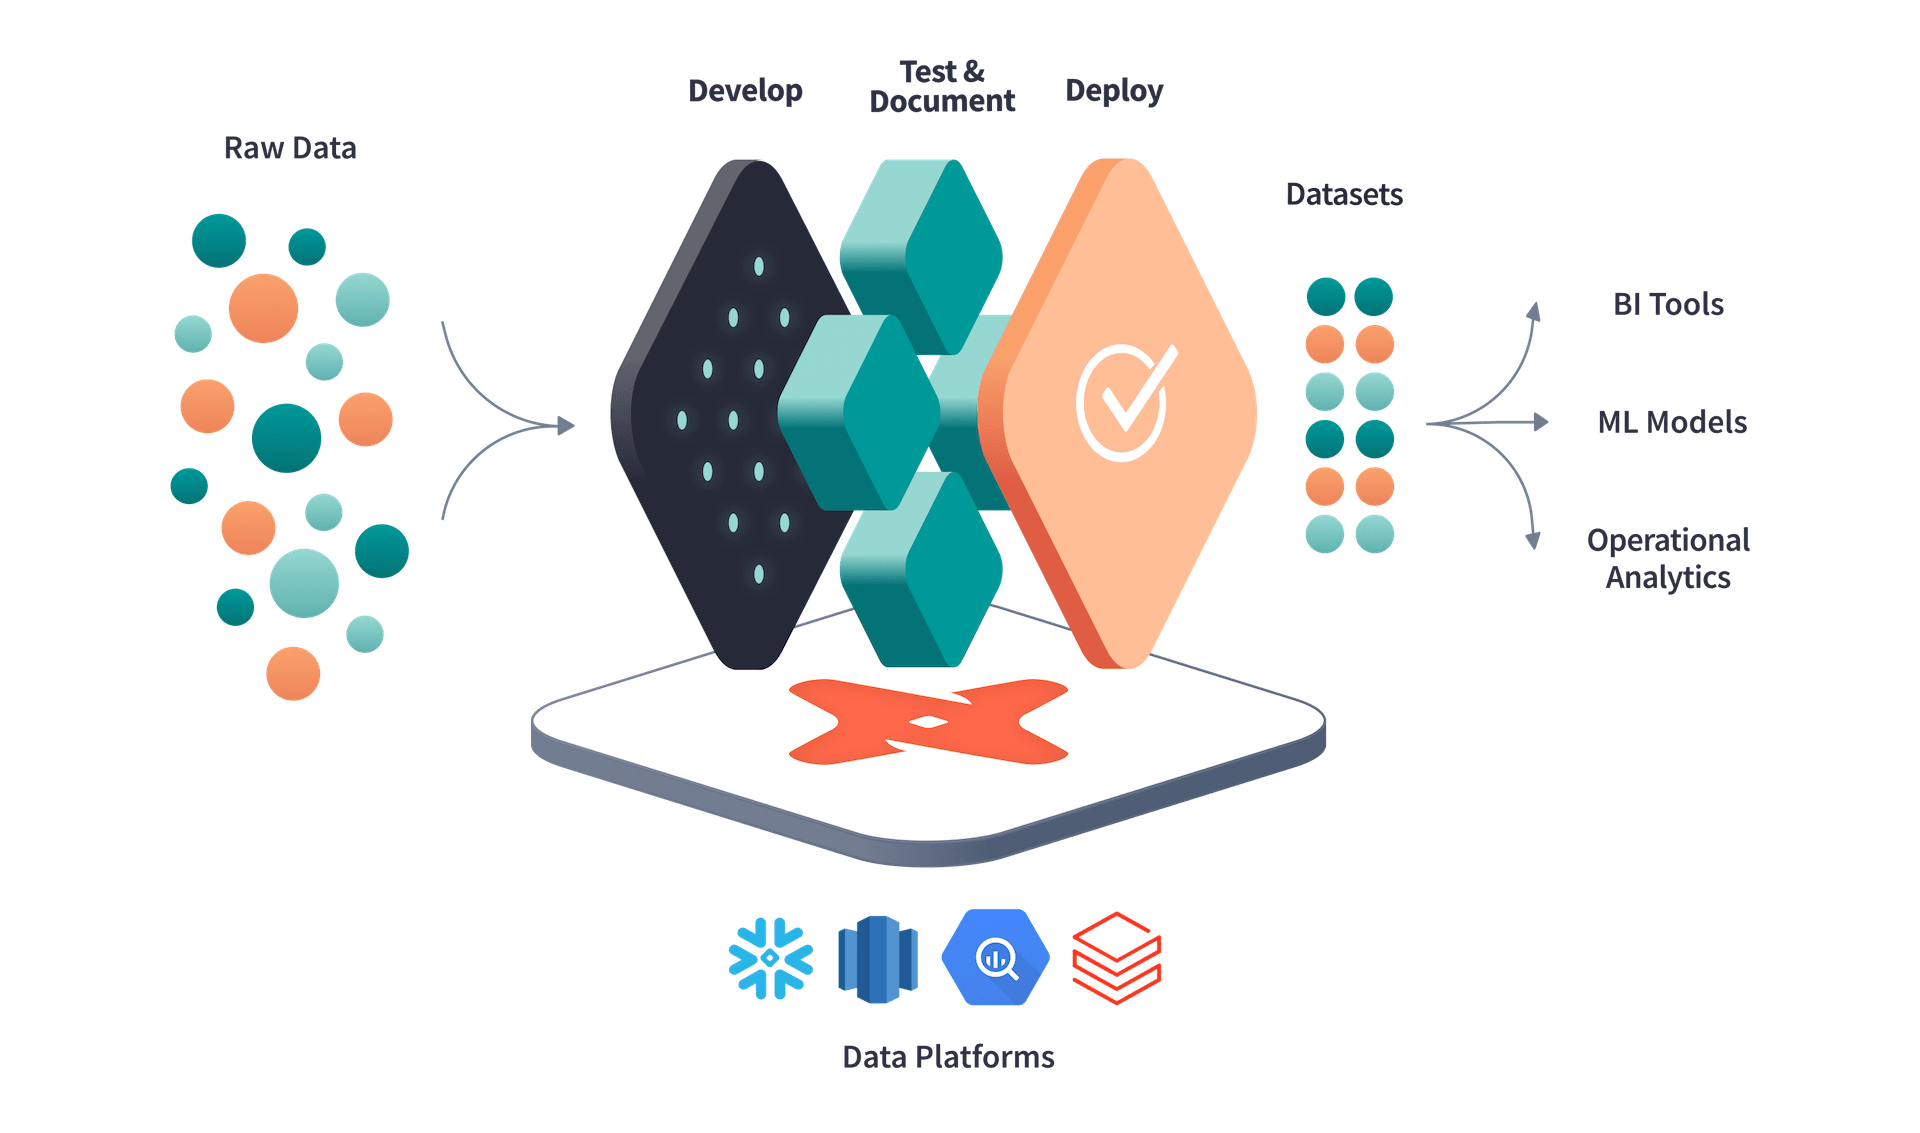
Dbt is a tool for transforming raw data into processed ones that are ready to use for business analysis and any other data-driven solutions.

Getting started with dbt
Install dbt
There are several ways to install dbt; the easiest way for macOS is using homebrew or pip. Dbt needs adapters to connect with data warehouses, and it does not include those in the core packages. So, we need to install at least two modules to start a dbt project.
If the project requires integration with BigQuery, we will install the BigQuery adapter. For example, if you use pip, run the following command:
# install dbt-core
$ pip install dbt-core

# install bigquery adapter
$ pip install dbt-bigquery

# install snowflake adapter if necessary
$ pip install dbt-snowflake
Initialize dbt
To initialize dbt from the scratch, run dbt init command.
$ dbt init --project-dir blog-dbt
Next, you need to check the details of the project, such as
- Project name
- Profile file path
- The default profile path is ~/.dbt/profile.
- Which data warehouse to connect
- Authentication method to connect to the warehouse
- Service Account or OAuth
- OAuth is better to use because of the security matters
- Adapters that you installed
- Location
- You can only choose the US or EU, but you can change it to something else later.
Directory structure
After running the dbt init command, it will create project files and directories.
$ tree blog_dbt
blog_dbt
├── README.md
├── analyses
├── dbt_project.yml
├── macros
├── models
│   └── example
│       ├── my_first_dbt_model.sql
│       ├── my_second_dbt_model.sql
│       └── schema.yml
├── seeds
├── snapshots
└── tests
- analysis: the directory contains SQL queries for analytics
- dbt_project.yml: the main configuration file for the project
- macros: the directory includes macros - tiny functions
- models: the directory where you save your main SQL code
- Dividing models into subdirectories is a common practice.
- seeds: the directory for the CSV files called seed data that can be loaded into the data warehouse using the dbt seed command
- snapshots: the directory stores the change logs of mutable tables
- tests: the directory contains the test code for the dbt test command
Connect to BigQuery
By default, the dbt init command creates ~/.dbt/profiles.yml, a profile with the content like:
blog_dbt:
  outputs:
    dev:
      dataset: dbt_blog
      job_execution_timeout_seconds: 300
      job_retries: 1
      location: US
      method: oauth
      priority: interactive
      project: noted-sled-349511
      threads: 1
      type: bigquery
  target: dev
I have changed the location to Asia-northeast1 because I created my BigQuery dataset in the Tokyo region.
As dbt init asked, I select OAuth for the authentication method because of its security advantages. By default, dbt uses gcloud, so we need to login to Google Cloud by running the following command:
$ gcloud auth application-default login
Here is Google's official document for the default login.
Running dbt
First, running dbt debug command, we need to check if dbt can connect to BigQuery properly.
$ dbt debug
And if everything goes well, it will show like this:
$ dbt debug

Configuration:
  profiles.yml file [OK found and valid]
  dbt_project.yml file [OK found and valid]

Required dependencies:
 - git [OK found]

Connection:
  method: oauth
  database: noted-sled-349511
  schema: dbt_blog
  location: US
  priority: interactive
  timeout_seconds: 300
  maximum_bytes_billed: None
  execution_project: noted-sled-349511
  job_retry_deadline_seconds: None
  job_retries: 1
  job_creation_timeout_seconds: None
  job_execution_timeout_seconds: 300
  Connection test: [OK connection ok]

All checks passed!
Now you are ready to develop your ELT logic using dbt.
# compile the dbt code and generate the final SQL query
$ dbt compile

# run the transform logic within the warehouse
$ dbt run

# unit test
$ dbt test
dbt run command will create a view or materialized table within your BigQuery dataset depicted in the following image.

Documentation
Dbt has an automatic document generation feature that makes it easy to keep the documents up to date. The following command allows us to generate documentation automatically.
# generate document
$ dbt docs generate

# launch webserver
$ dbt docs serve
dbt docs generate command will generate only a JSON file, and to read the documentation, we have to run a web server locally and access it from the browser. Fortunately, dbt provides dbt docs serve command, which does these for us. This command automatically opens a new tab on the browser with 127.0.0.1:8080 in the address bar, where we can read the documentation.
If the information provided by the dbt docs generate command seems insufficient, you can add more using the awesome block unit.
Conclusion
Starting a dbt from scratch is simple because of the useful commands and packages. To know more about dbt, please access the official site, and you can find plenty of information.
With dbt, we can manage our data transformation in one place, and it creates the documents automatically. Also, dbt can integrate with various data warehouses, which is a significant advantage for data engineers.
Happy dbt-ing!
